Friday 26 September 2014

Recording Sound For Film

Sound Capture for Film

Capturing sound for film is different when outside than recording in a studio, like voice over, where the set up would be similar to music production. We got to try a number of different microphones that would synch up with the video we were recording. If we were not using a cable to connect the sound to the video feed a Clapper board or a strong click could be used to create a peak in the signal allowing an easier sync up in editing. We were left to do some experiments with the Boom microphone set up to see what it would be like with the portable box and the boom pole noting that a microphone cover or dead cat could be placed on top of it to reduce noise from popping and plosives and also wind. The Boom mic had a small field of sound pick up possibly a hyper cardioid pattern that required careful control over the direction it faced.


Shot Gun Microphone

We got to use a Shotgun microphone mounted upon the camera's head first and then we incorporated it with the boom to see how that can be utilised with film sound. The audio we collected from this was mono but had better quality and a tight direction cutting out most of the sound behind the camera.


Shotgun Mic from Conker on Vimeo.
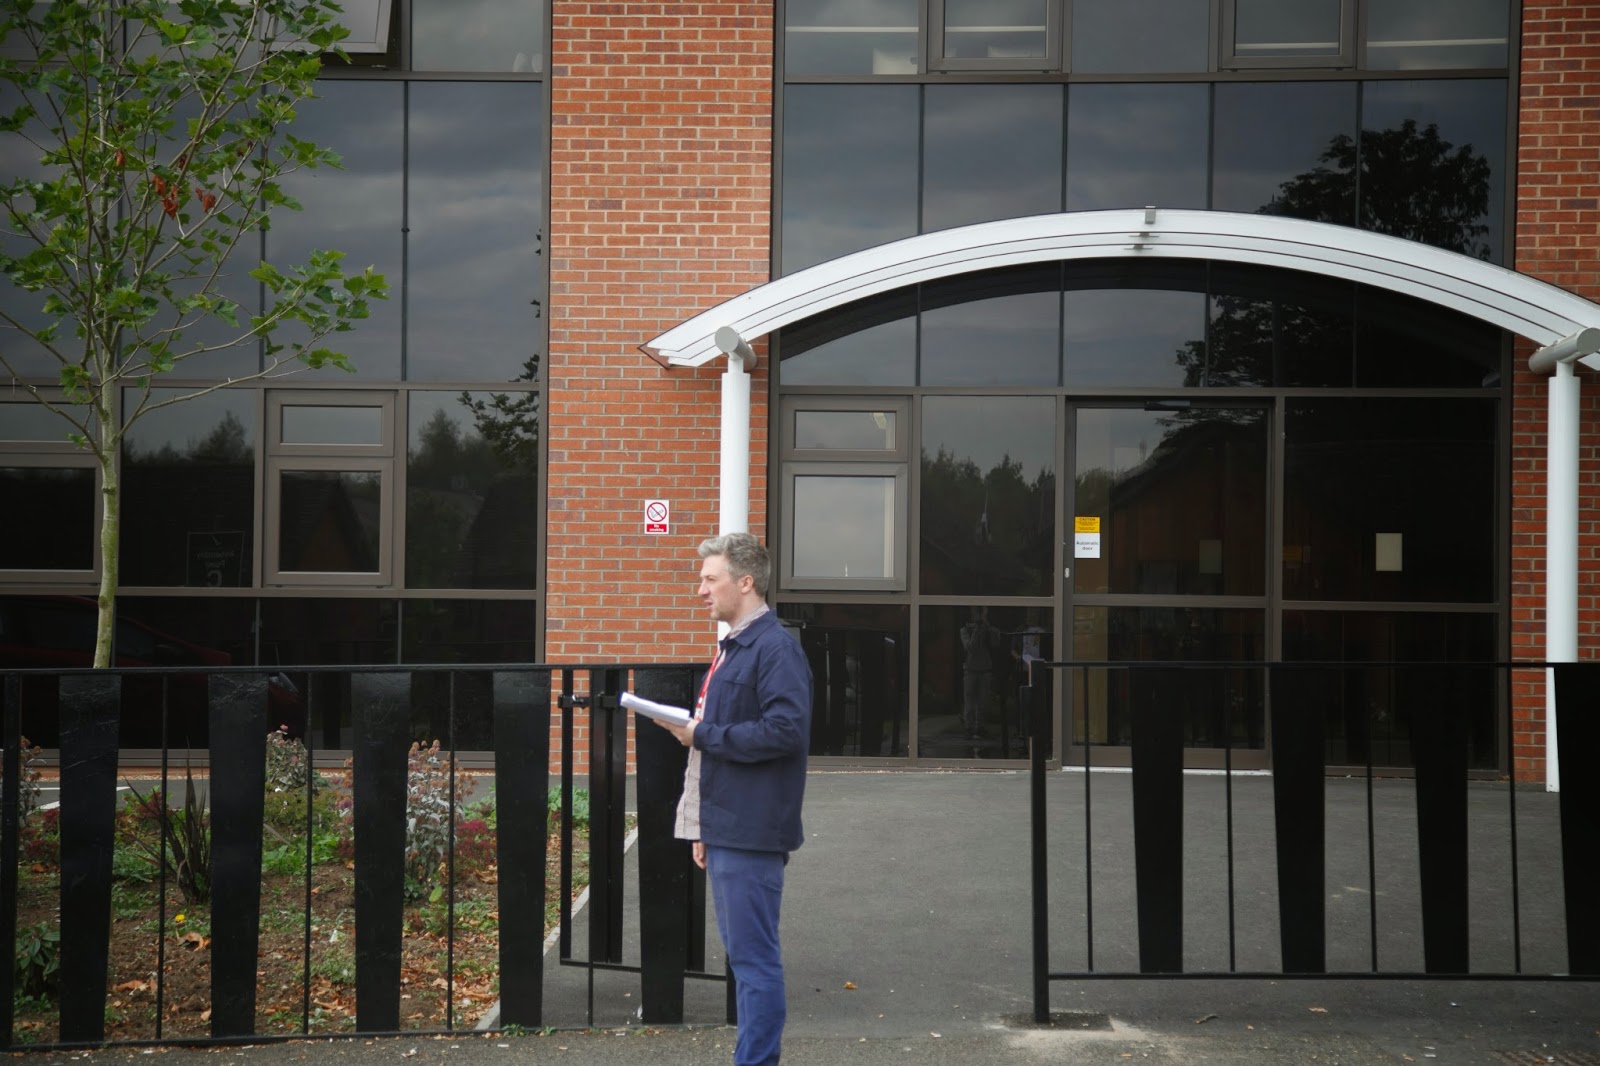
Zoom Microphone

The Zoom microphone is a portable machine with two microphones crossed on top to collect a stereo signal. We first recorded separately with the Zoom mic which gave us a soundless video feed and then a audio file on the Zoom's memory card. Then we recorded with the set up hooked into the camera to record both at the same time. Both of the audio from the Zoom mic had good to very good pick up of sound if the quality was less than the Shotgun mic. Its good pick up and portability would make it great for ambient sound or for stereo interview. With film it would be good for hand held and on location uses.


Zoom Mic from Conker on Vimeo.

Monday 22 September 2014

Lighting Setup - Studio Lighting Techniques

Lighting Setup - Studio Lighting Techniques

Why light for film? There are many reasons and applications that you can use specific lighting techniques in order to get a subject or scene to look just right. cameras use light to record its images so by changing how and how much light gets through to the camera you can create all sorts of effects. Listed and explored bellow are three studio lighting techniques that can be utilised to give various effects.

Rembrant Lighting

Rembrant was an artist from history and in his portraits he gave his subjects a glow and a small shadow under the nose to create a triangle of light from it and onto the cheek but under the eye connected. We can recreate this effect through lighting to be used for film through positioning a light source above and across from the subject to have some shadow be cast by the face. To achieve it, you may have the subject turned until the triangle of light is there and more defined.


Butterfly Lighting

The Butterfly Lighting effect is a technique when the subject is lit from high above and casts a small butterfly shaped shadow just under the nose and above the lips. Whilst the shadow may only look small its effect builds up to create a glamorous storm of an image. Typically used in movies from 1940s Hollywood, to make there lead actors look glowing and glamourous.


Edge Lighting

This truly is lighting on the edge. Edge lighting is a dramatic style of lighting your subject such that it appears as one half of the face is cast in shadow. The style is made by positioning the key light (brightest light source) to one side of the subjects face and having, if at all, a much dimmer secondary light or reflector to cause the contrast on the face. This creates a definite edged line splitting the face and the feeling that there is something being hidden by your subjects character. An edgy character who may be... two faced! oh ho ho! :P


Lighting from Studio from Luke Heritage on Vimeo.

Health and Safety

When setting up lights be sure to have them switched off and at the socket too when plugging them in. The wires must be secure by wrapping them around the stand and wires on the floor must be visible and approached carefully as not to trip. The stands that the lights are on must be set up correctly and to be standing stable, be sure not to overbear the stands as it may cause damage to the stand or falling lights would cause injury to crew and further equipment damage. The bulbs used in film, studio and photography lighting get very hot, very quickly and can remain so for a long period of time after use.


Camera Features

Camera Features


The Lens

The major feature of all cameras are its lens, a piece of refractive clear material used to collect, focus and disperse light. Camera lenses are used to collect the light information to be recorded as an image. In digital cameras a series of sensors convert the light information whilst in film cameras the light is exposed to film. In cameras the light needs to be channeled through the hole in the structure otherwise any image recorded would likely be blurred. The basic lens shape is convex, bowing outwards, with extra elements in more complex cameras to keep flare and distortion down to a minimum. 

Aperture

Aperture is the size of opening to the lens of the camera just like the pupil is to our eye. Changing the aperture changes the depth of field F stops are the unit of which the aperture is measured where the larger the number the smaller the aperture. So f/2 is big and for close up focus f/22 small and deep focus


Shutter Speed/Frame Rate

How fast the the camera closes and opens over the lens to take an image. It is usually measured in frames per seconds, starting at a smooth 1/24 the shutter closes 24 times in a second creating 24 stills which when showed in Taking photos at a faster shutter speed would be needed when capturing movement to create a smoother image. As it creates


I.S.O. Light Sensitivity


The light sensored by the camera us usually clear and set to 100 which is an average setting and suitable for average lighting conditions. it increases usually in doubles but the higher the sensitivity the more noise and grimness is in the image


Practical Examples

ISO - 100
 - 200
 - 400
 - 800
 - 1600
 - 3200
 - 6400

I have noticed in this example the increase of light information that the camera has captured as I increased the ISO settings. I didn't notice much grain and noise in these images which may be because it was just still frames.

Shutter Speed (stills)

Slow shutter speed of 1"


Medium Shutter Speed of 1/60


I found that the increased shutter speed let in less light but clearly captured the light information with very little to no motion blur as the subject clapped her hands. The slow shutter speed was much slower than possible to use, as far as I know at this moment in time, for moving image but it does more clearly highlight the effects of motion blur. With the slower shutter speed there is more light coming through as the exposure time is longer but this gives chance for moving objects to blur.

Aperture

This photo was take with an aperture of f/ 5.5


Aperture of f/ 21


Sunday 21 September 2014

Metadata and Bins - Premier Pro organisation

Premier Pro Organisation

When creating and editing projects using premier pro there are a few things that would be best for you to follow in order to keep files managed so that they may be used easily.

Bins and Labeling

When you import your clips into Premier Pro they are placed into the finder in the bottom left of your screen under your project. These files could quickly increase to a large amount and with the default code given to them as a name you would quickly lose or forget which files are which. The first thing that must be done with any of the files imported then is to make sure that all or them are named or renamed with appropriate names that describe and identify the shot.


To increase your organisation it would be necessary for you to split your clips into different folders or "Bins" based on if they are shots for different scenes or from different shoots. You can create a bin by clicking the folder icon in the bar at the bottom of the project window. Make sure again that you label the bins so that you know what is contained with in each of them. Drag the files that are appropriate for the bin and then they are contained and can be seen or hidden using its drop down function.

Metadata List 

There is a list of various information on objects that are imported into Premier Pro that can be used in tagging and finding certain clips as well as organisation. This data is metadata and what is shown can be edited in a window, so that you only see what will be important to you. Hovering over each option will give you a brief description of what the data holds if you are unsure such as Video Usage counts how many times a specific item of video has been used in the project so far.

Titles
Titles can be added to overlay any clips that you have contained in your project when played. This can be used for subtitling or to give an introduction to what the clip being shown is about. They are created by selecting the New Item button, at the bottom of the project bar, and choosing Title. This will launch the Title creating and editing window where you can choose where the text will go, font and size by using the various sliders and drop down menus. When you have  created your title simply exit and you will find it in your project display among your other imported files. You can now drag and drop it into your project where you can move and resize its length in the timeline.

New Wave Brief - Own Wave

Unit 30 New Wave - Own Brief

Through the influence and techniques of the "New Waves" in cinema, I shall be creating a short film of about three minutes in length. My film will be in montage having its story journey between two main separate locations. Something that was key to new wave creators was personal ideas were connected to filmmaker experiences throughout. From what I have gathered in the documentary No Subtitles Necessary (2008) the film Paper Moon has an exploration of a daughter and her father, its cinematographer, Laszlo Kovacs, who had his own daughter but didn't meet her but paid her mother throughout. I would use my personal history such as the film makers in the 60's and 70's were affected greatly by such wars such a WW2, the Cold war and the Vietnam war. I particularly haven't been affected by such things but I will look at the situations facing me and my own disillusionment like the Hong Kong second wave as it approached its being handed back over to China. This may include ideas of what you should be doing and should have done by my age, as a young adult, in education, in/out of work how to form and maintain relationships in a mature manner. In particular the question of "What are you up to?"  is personal to me as the answer is nothing and i feel like I have to give proof in order to have the right to exist. This will become my focus and it is important to explore the creators context as in New Waves it directly feeds into the finished project.

The camera that will be used will be portable and within the available budget and equipment. I shall film on the locations using natural lighting and natural ambient sound. This basic equipment and ambient sound was very much to do with how new waves created their films and how I will create my piece. Rules of the camera such as the rule of thirds and the 180 degree rule may be pushed or even broken in my project. The way things were captured in New Waves was different the camera takes were long and edited with sharp straight cuts or jump cuts were used in transitioning. I shall use the cuts very disjointedly like in Easy Rider where the cutting back and forth through scenes alerts the viewer that they are watching a film I will be blurring my roles in creating this film. I may also record in black and white to create stronger contrasts that were used in New wave cinema.

Narratively I want to have a relationship start to develop between two naturalistic characters walking down various ways and spaces, where their trust and suspicions are explored. Who are we and do we shut off so much to the point where we shut of our selves, what is too much to entrust to another.

The framing as I will be focusing on the people, using their enviroment and setting to shift focus depending on much trust there is. I will use the two shot to give the sense of togetherness, be it forced or not, then the shot reverse shot would be more confrontational and not just conversational, putting them against each other.

The New Wave influence will have to be recreated though as the time when it was happening has past and limits such as the relative expense of film its self and the availability of recording in different places. Tracking shots using already moving objects would be a good New Wave use of escalators or cars to get shots. I will decide to use places that are safe and where possible I have permission.

Health and Safety

Health and safety must be observed in the recording and collection of all footage. Each recording session and new location must be checked that it is safe before filming can commence.

Monday 15 September 2014

A Blonde in Love Recreation Project - Recording Plan

A Blonde in Love Recording Plan

Today, 15th Sep, the group and I discussed our plans for recording, we had previously already planned to record shots today. So we went on to record the shots to be taken in a shot list that we would tick off after we had acquired each of the shots. This will come in handy as we can shoot out of shot order yet record what we already have. 

We also needed to sort out the equipment that would need to be used and booked out. Luckily one of our team has and brought in his own equipment so for this we wouldn't need to complete an order form. The equipment he has for us as a team is a Camera, Mono-pod and Memory Card. The lighting is not much hassle as for most new wave production it is using the natural lighting of the location. The same goes into the planning of the sound as it would be the natural sound of the places. We would have to consider when using the natural lighting and sound the effect of the ambient influences such as the sun being brighter in some shots, causing continuity problems, or if there are loud traffic noises that would interfere with the take.

We decided we would have roles in our team but blur the lines so as we could cover all the bases needed to get the footage. James will be camera man, I will be in control of the shots and the shot list, Insert name here will be in charge of locations. We all will be doing our own edit with the shots taken and we all will be working together to direct and act in the piece too.

A Blond in Love Recreation Project - Possible Locations

A Blonde in Love Recreation Project
Possible Shoot Locations

As a group we have got back together as we had planned, to find and take photos of potential locations we could use for the shots needed to recreate the given scene from A Blonde in Love. Firstly we discussed what we would need to get by looking through the powerpoint of of scene changes. When we had ideas of what we would be looking for we talked about different places we know already that might make for a usable location. After the discussions were through we decided to go out and around and take photos of places we would see that would be possibilities. One member of our group took the photos with a camera whilst the rest of us took evidence photos of him. We discussed more and evaluated the photos as we took them, looking at the angles we could capture from, the distance and framing of the shots too. There were some issues of health and safety we knew were apparent such as filming near a road where you could get ran over if you went onto it. There were also some issues with potential places such as not having access to them for the kind of shots we wanted and other places were too different even with attempts at compromising.


The first scene to get for the clip is that of a busy industrial estate area, where workers are filing out of the gates in large numbers. The location we saw was quite similar to this was this entrance way. Knowing that there is a security measure to leave, at a time such as lunch (midday) or later in the afternoon after most college lessons have finished, we could quite readily recreate the busy naturalism that is seen in the source clip. 


Just slightly down the way is a place where there can be the continuation of the clip's second shot. The image immediately above us has some good similarities such as the gating, although lower, is straight across the walk way and path that the actress takes. There is also a small tree in a similar place to where the post is in the source and makes a similar framing reference. There are of course things that don't work with this location such as the modern cars and glossy building in the back ground. A way to get past this would be to change the focus to have the background, to have the gate and people in focus instead.


Looking for a location for a window shot was very challenging as we didn't have access to many upper floors of buildings so the ones around the college were where are search mainly took place. We looked at the styles and positions first of all, the way that they are shaped and if we could  get people in them for the shot. The older looking windows style was very different and by the windows being too close it would be hard for the framing. The other high window opened a different way and whilst we could compromise with that, as you could get an actor in the space, the window just wouldn't open more than a couple of inches.


In this case we also tried to get a good angle on a low window to see if we could recreate the illusion of it being a high window and someone calling out.  Whilst a good idea and possible when we for low enough, we would need to find a way to keep the shot steady enough.


Other low windows were too small or too high for someone to be seen, whilst a chair or a step ladder could have been used this would have caused issues of safety for the actors.


Going back to higher windows, we found a couple that we could use but would have to be recorded from the other side as to the original source material. Though through discussion it was suggested that a crafty flip of these one time actors may not so noticeable. We also looked at other places outside and around to find more suitable locations.


Thursday 11 September 2014

A Blonde in Love - Recreation Project

Task: Recreate a Scene from the New Wave Film
A Blonde In Love

We as a group have been tasked to recreate the style and cinematography of a scene from a New Wave film, as closely as we can. We were able to disscuss and set up a few things that would help us in a plan to as closely get the shots needed. Things such as where the shots and scenes changed throughout the clip also how the camera moved and where it was placed.


Firstly we opened the clip and paused to take a screen capture at every instance the shot changed, so that we would have a visual reference for each shot we'd have to recreate.


The screen captures would save to our desk top where we would then rename them and save the files in an organised folder renamed and ordered. This would help coming back to them and later when importing them into the image story board.


Next we went through the clip again this time scrolling through the search bar to record all the rough timings and durations of the shots. This list did not need to be as accurate as we would be recording a few seconds extra either side to as aid in getting a more accurate edit. How were we to get more accurate of an edit of timings? We decided on creating a premier pro file and importing the clip to mark out the frames in which the scenes changed.


Before creating our premier pro project we created and named a folder for all of our files in this project to be placed. This was in order of organisation but also would help with running the project as all files could be easily loaded and located from the same space.

We imported the clip through the File menu and it was added to our bin which we dragged and dropped into the time line.


By using the arrows on the key board we could steadily progress through the clip stopping at each first frame of the next shot.

Placing marker was done by using the shortcut "M" button on our key boards, speeding up the process it took to do.

With the markers placed we had our selves a template ready for editing to be done once our shots had been collected.

With the project saved another of our group brought together the image story board through using power point. By importing the captured images of the shot changes we compiled an ordered image story board with the important information we'd need to help us shoot the scenes from the clip later.


The main information added included the shot number; the length of each shot taken from the rough list and details of any camera movement. Here is the presentation we will be using.

Next our Group plans to go on to look for locations where to shoot. we'll be taking into account its suitability for the shots and also health and saftey.